
Add Subject FAQ
Common questions about enrolling subjects (participants) in a project.
How do I add a subject?
You need Subject Management at the site.
- Sign in at https://my.studytrax.com.
- Select your project from the project selector on Home.
- Click + Add Subject in the Home toolbar.
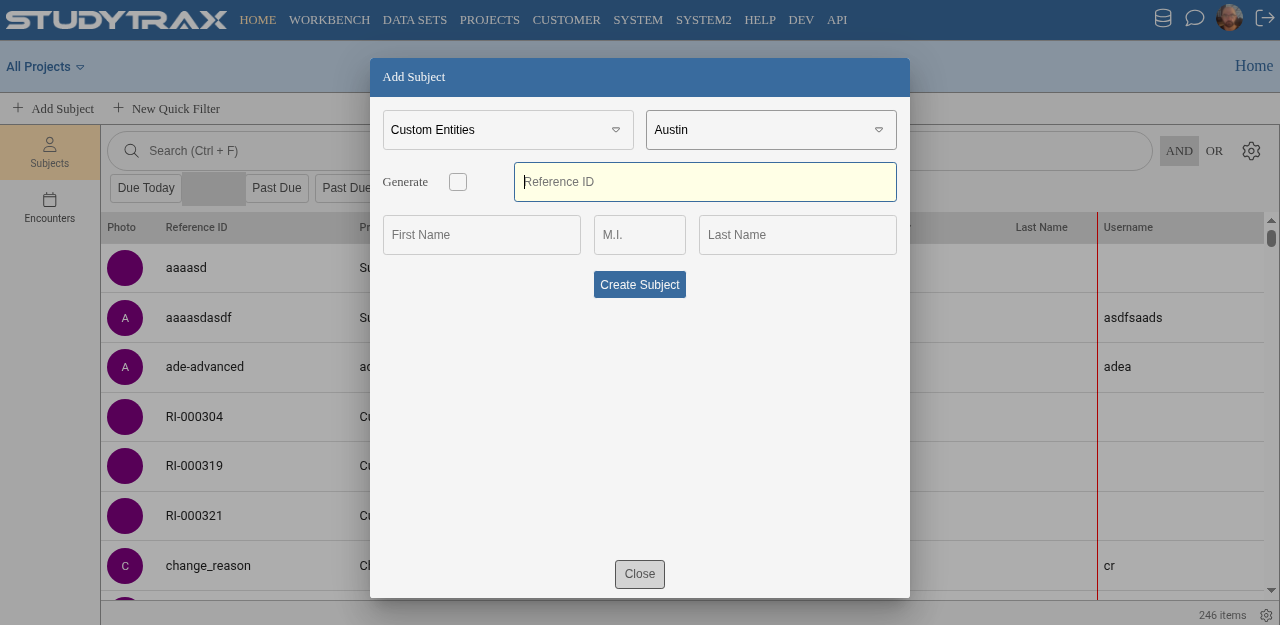
The Add Subject dialog includes:
- Entity dropdown (if Custom Entities is enabled)
- Site dropdown (required)
- Generate checkbox (if auto-generation is configured)
- Reference ID (required—unique across all projects for this person)
- First Name / M.I. / Last Name (optional, depending on project)
- Click Create Subject.
→ Add subject how-to | Subjects
What is the Home toolbar?
The Home toolbar includes: + Add Subject, + New Quick Filter, Reports.
What fields are required?
- Reference ID — always required, unique across all projects for this person.
- Site — always required.
Other fields (name, Project ID) depend on project configuration.
What is the difference between Reference ID and Project ID?
| ID | Scope | Required |
|---|---|---|
| Reference ID | Same person across all projects (customer-wide) | Yes |
| Project ID | This project only | Optional per project; if on, every subject needs one |
What columns appear in the subject list?
The subject list columns are: Photo, Reference ID, Project ID, Site, Status, First Name, Last Name, Username.
What is the relationship between subjects and Custom Entities?
When Custom Entities is enabled, the Home header shows Custom Entities with tabs for Subjects and Encounters (plus any custom entity types). The Add Subject dialog includes an Entity dropdown so you can select which entity type you are creating.